So I couldn’t let the opportunity pass to make by baby big girl a birthday outfit! I was searching on-line for something fun, and this is what I came up with. I’m sorry I didn’t take step by step pictures for this project, I was just too busy sewing and trying to get it done in time for her big day. For the tutorials you’ll have to visit the websites of the original creators (they’ll do a better job explaining then I would anyway!)
Skirt
I used a thicker white muslin as the base of the skirt (I bought a 1/2 yard, but it was WAY too much!)
Tulle. I used dark purple and light purple (the middle layer was one dark piece and one light piece). I made 3 inch circles and layered two pieces of tulle for each triangle.
Elastic (you need 2 inches less than your waist size)
Follow directions at Simple Simon and Company to make your own!
Next is this adorable necklace shirt (sorry one of the “strands” is folded under).
Shirt
$5.00 t-shirt from Target.
2 colors of fabric paint (I used lavender and a silver glitter that I had to mix with the lavender b/c it wouldn’t stick very well)
foam paint brushes (I used two different sizes) – you dip the bottom end in the paint to create your beads.
Ribbon for bow (or you could add a flower or any other embellishment)
Follow directions at Living Craftily Ever After
Thursday, May 5, 2011
1st Birthday Skirt and Necklace Shirt….
Sunday, April 17, 2011
Candle Makeover…
I have been looking for new candles for awhile now. Since my husband painted our walls to sand, these candles blended in. I did NOT want to spend a fortune on decoration candles. It was hard to find a good color for under $8. While at JoAnn’s, I saw a candle decorated in paper. My first thought was, “why would you do that?” Then it hit me that I should find a really fun paper to wrap around my candles! That exactly what I did.
Start by measuring the height of the candle and circumference (around) the candle.cut your paper to those measurements. (I ended up cutting mine smaller before gluing it on)
Center your paper in the middle of the candle.
Hot glue the ends together.
The full look. (Notice the red wall gone!)
*Sorry for all of my pictures being crooked. I guess I can’t take a straight picture, and I don’t know how to fix it
Frame Makeover…
I’ve been introduced to the world of spray painting and it is addicting! Here is one of the many things I’ve spray painted over the last week (others include candle sticks, bookshelf, and a metal star). In my attempt to brighten my house, I thought it would be fun to change these picture frames. They worked well with the old décor, but were a little dark for the new look.
So after buying cheap spray paint, I went back and got Krylon. It works great! After one coat. If you look closely, you’ll notice the paint really isn’t adhering to the frame very well. It took several coats for them to look nice. Later we (a friend and I) learned that we should have used primer first. It makes a HUGE difference!
I filled the frames with some fun fabric! My husband says he still prefers picture (a nice way of saying he doesn’t love it), but I’m going to keep it to see if he warms up to it :)
A close-up.
Wednesday, March 23, 2011
Letter Makeover…
So I have two walls in my kitchen painted red, and basically everything on the walls are black. I really liked it at first, and still think it looks cute…just time to add some more color! I decided to go with the letter “E” that sits on the shelf. I used the same paint as I did for the pillow. My husband informed me that painting the e’s the same color might be overkill. Oh-well. The wall before.First coat. I thought it looked cool to leave it like this at first, but once I put it on the shelf I quickly realized it looked like I’d just done a horrible job painting it. I since added a second coat and it looks so much better!
I realize the color doesn’t really go with the wall color. Eventually, I want to paint it back to a more neutral color. I’m not sure how my husband feels about it, but I’m going to give him some time to warm up to the idea :)
Friday, March 18, 2011
Pillows…
I’ve been in a redecorating mood lately. Our place is starting to feel small to me, and since we won’t be moving anytime soon I decided the inside needs a makeover! So two things inspired these two pillows 1. add color and 2. I love the initial pillows. I decided to do both of those things with the pillows I made.
Initial Pillow Instructions:
Materials:
Pillow cover (you can make your own pillow if you want).
A stencil or letter cut out of paper.
Paint – fabric paint would be best, but I used acrylic paint for mine.
foam paint brush.
I used an Ikea 20x20 pillow cover. Be sure to put something between the layers so the paint doesn’t go through. I used cardstock. I cut an “e” out of paper for my stencil.
I taped the paper down so I wouldn’t get paint under the paper. Be sure to paint carefully on the edges.
Wait for paint to dry and pull off paper/stencil (Mine didn’t turn out perfect, but good enough).
The finished pillow! I thought I had a pillow big enough to fill the cover, but I was wrong. So I’ll need to get one. I also used a teal paint to add color!
Purple Pillow Instructions:
Materials:
1/2 yard fabric
Pillow 16x16 (finished dimensions)
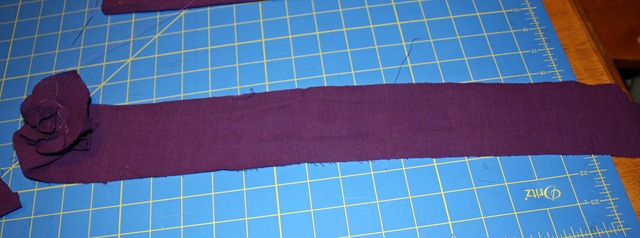
Flower: 4in x 34 in
Start by making your flower. Pinch corner and start wrapping fabric (flat) behind the fabric. Hand sew together as you wrap to hold flower together. (that probably doesn’t make any sense…just follow this link to show you how).Be sure to sew flower onto the pillow before sewing the 4 edges together. Remember to leave a small opening to flip pillow through (sorry I didn’t take pictures of these steps). I filled this pillow with batting from Joann's and whip stitched the small edge closed.
Finished pillow!
Both pillows together. I love how it adds color and fun to my brown room!
Thursday, March 17, 2011
Table Fort…
I saw this table for at Make-it-and-love-it forever ago, and finally decided to make it! Our place is getting small, and this just opened up one more place for my kids to play. I love that! I tried my best to give directions, but by the end I stopped taking pictures and just wanted to get it done. So it’s best to just go to Make-it-and-love-it’s website for the full directions.
I went to Jo-Ann’s to buy fabric and it was going to cost around $27.00 just for the fabric to cover the table (and that was on sale!) So I ended up using two top sheets and saved all that money!
I don’t have exact measurements for anything, because I basically just laid the sheet on top of the table and cut around the table. I just prayed it would end up working, and it did! I made 4 panels to add to the top sheet (2 long and 2 short)
On one of the longer panels I cut out a rectangle for the door.
I used biased tape to hem (finish the edges) of my door and windows (I used two packages for one door and two windows)
To make the corner, cut the bias tape into a “V” shape and sew along the “V” When you refold it, it creates a nice corner.
Pin to the door and windows and sew.
Use clear vinyl for cover the windows.
Next, I added embellishments to each side.
Daylynn insisted on having a pink door so that’s what she got! I sewed it on the left side and attached ribbon and velcro to the other side to close it. I also attached a piece of velcro to the other side to keep the door open.
Curtains for the windows (side window)
And the back window.
On the other side I used fabric glue to add some flowers.
After this step, you attach each side to the top sheet. Please follow make-it-and-love-it’s link above for directions on this part.
And here you have one happy girl playing in her fort.
Friday, March 11, 2011
Cake Stand…
For enrichment, we had a craft night (finally something to get me crafting again!) I singed up for all but one of the things, and finished two so far. Be sure to check post below for the second project. Now, this is a fun one! I can’t wait to make many more of these different ways for different things. I included some links below of other fun things you can do with it. I love the idea of using it for a jewelry stand.
Start with a plate and stand (cup, candle holder, vase, tea cup etc.) A great place to find fun dishes is the Goodwill/D.I. I unfortunately didn’t have much luck the day I went, but Homegoods saved the day! Thanks to friends who helped me find this adorable plate and Sundae dish.
1. Be sure to have clean your plate and “stand” well before starting. I turned the cup upside down and glued the bottom of the cup to the plate.
2. Measure the diameter of the plate and the part of the stand that is being glued to the plate. This will help you find the center. (Truthfully, this part went over my head. You can just eyeball it if that’s easier).
3. Use Gorilla Glue to glue the stand to the plate. Just follow the directions on the back of the glue. Be sure to put something on top of the stand to keep the glue of expanding.
And there you have it! This is going to be the girl’s birthday plate! Addison’s 1st birthday is just around the corner (less than 2 months away!!)
http://www.flickr.com/photos/14323376@N08/3054194267
http://mimpimurni.blogspot.com/2010/06/diy-cake-stand.html
http://www.google.com/imgres?imgurl=http://www.fcinnercircle.com/.a/6a010536b6f447970c0115703127cb970b-800wi&imgrefurl=http://www.fcinnercircle.com/fc_inner_circle/home/&usg=__t-_gDzzlnS4V_kWM9IMPxzpKr38=&h=400&w=400&sz=58&hl=en&start=0&zoom=1&tbnid=z6_8A5bBjQApbM:&tbnh=147&tbnw=147&ei=U6h6TfLJC9T6rAGskf3LBQ&prev=/images%3Fq%3Dcake%2Bstands%2Bfrom%2Bold%2Bdishes%26hl%3Den%26client%3Dfirefox-a%26hs%3DvPr%26sa%3DX%26rls%3Dorg.mozilla:en-US:official%26biw%3D1600%26bih%3D707%26tbs%3Disch:1%26prmd%3Divns0%2C228&itbs=1&iact=hc&vpx=1039&vpy=269&dur=956&hovh=225&hovw=225&tx=137&ty=248&oei=Sqh6Tf6BI4qV0QGnp-jbAw&page=1&ndsp=23&ved=1t:429,r:20,s:0&biw=1600&bih=707
http://www.flickr.com/photos/monbonbon/3054620598/